
Create company-level dimensions, such as a Class, Project, or Department, then apply those values to journal-entry lines for cleaner review and filtering.
When to use this
Use dimensions when your team needs to review ledger activity by a tracking label that is not a general ledger account.
Common examples include:
Class, when your team uses class tracking language.Project, when costs or income need to be reviewed by job or engagement.Department,Location, or another internal reporting group.
Do not use dimensions to replace the chart of accounts. Use accounts for financial statement classification, then use dimensions for the extra reporting view.
Before you start
- You can open
Companiesfrom the left sidebar. - The company you want to configure is selected or visible in the companies list.
- You know the dimension names and allowed values you want users to choose from.
- If you are adding dimensions for journal entries, users should know which lines need a value before posting.
Set Up Dimensions in Company Settings
- Open
Companiesfrom the left sidebar. - Find the company and select
Edit. - In the company drawer, find
Dimensions. - Select
Edit. - In
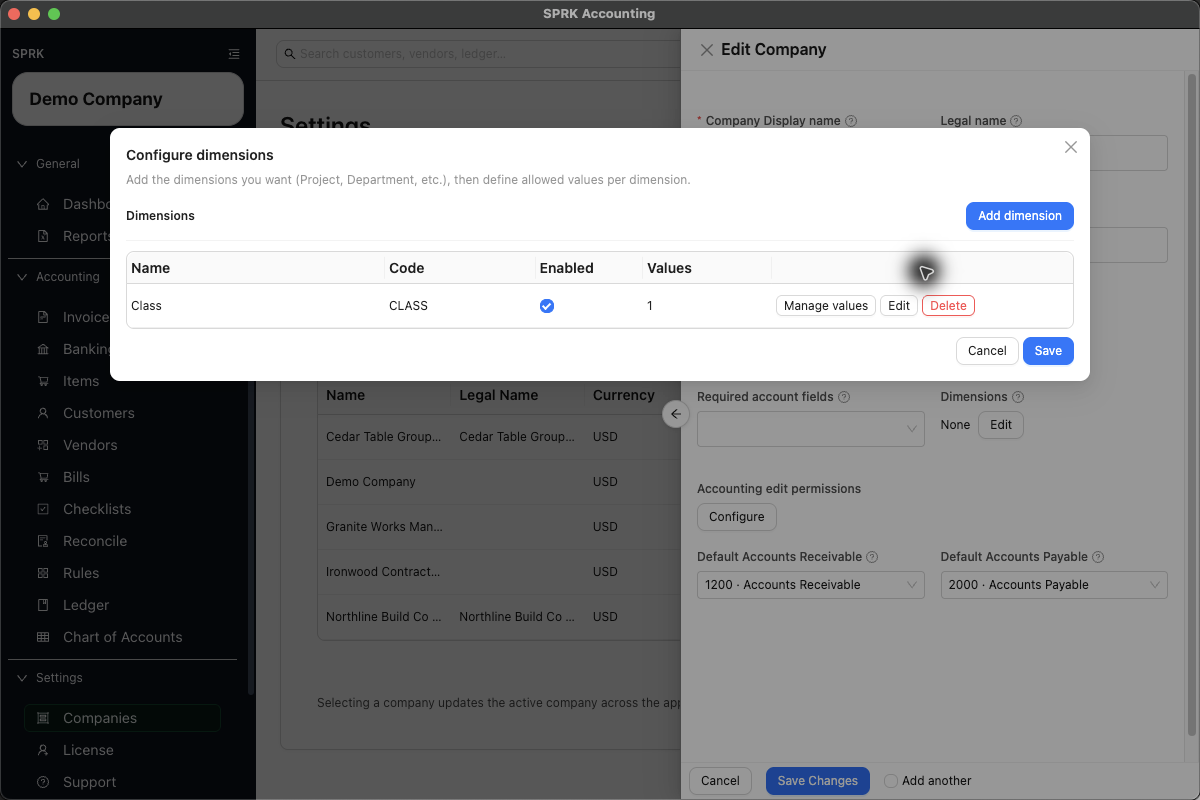
Configure dimensions, selectAdd dimension. - Enter the dimension details:
Nameis the label users will see, such asClass.Codeis optional, such asCLASS.Sort orderis optional and controls display order when you use more than one dimension.Enabledkeeps the dimension available for use.
- Select
Save. - On the dimension row, select
Manage values. - Select
Add value. - Enter the value details:
Nameis the value users select, such asOperations.Codeis optional, such asOPS.Sort orderis optional.Enabledkeeps the value available for selection.
- Save the value, return to
Configure dimensions, and confirm theValuescount is correct. - Save the dimension configuration.
- Select
Save Changeson the company drawer.
Add Dimensions to a Journal Entry
- Open
Ledger. - Select
New. - Enter the journal header details.
- Add each journal line with the correct account, description, debit, and credit.
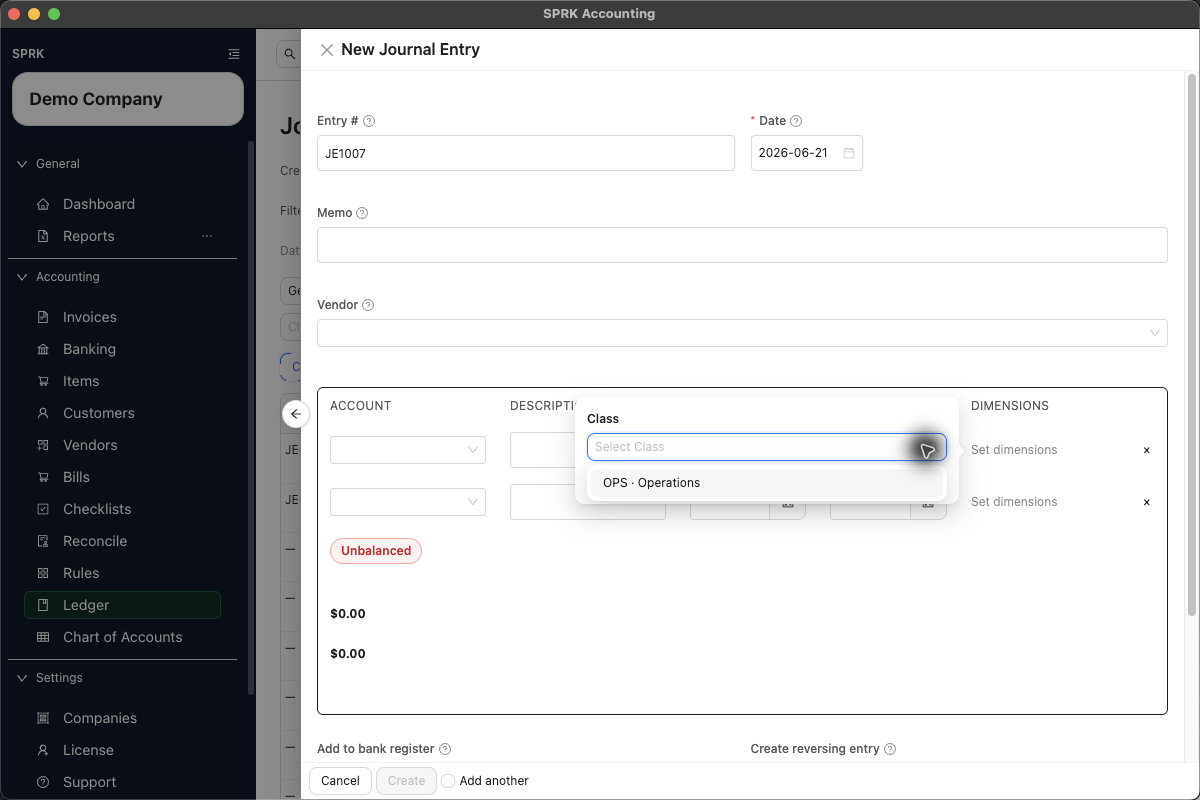
- In the
DIMENSIONScolumn, selectSet dimensionsfor the line you want to tag. - Choose the value for each enabled dimension, such as
OPS · OperationsunderClass. - Repeat the same process on any other line that needs a dimension value.
- Confirm the journal entry is balanced.
- Select
Createonly when the accounting and dimension coding are ready to post.
What This Changes
Saving company dimensions makes those fields available on supported transaction and report pages.
When a journal entry is posted with dimensions, the selected dimension values are stored on the related journal lines. Ledger review can then show a Dimensions column and filters such as Class Type and Class Value when dimensions are enabled.
If something looks wrong
| What You See | What To Check | What To Do Next |
|---|---|---|
Set dimensions does not appear on journal lines |
Enabled dimensions and values | Confirm the company has at least one of each |
| A value is missing from the selector | Whether the value is enabled for the company | Open Companies, select Edit, and review Dimensions |
| Users expect class tracking | Whether a Class dimension exists |
Create a dimension named Class |
| A journal is already posted | The company’s accounting edit permissions | Review the allowed correction path before changing dimensions |